If you are in the marketing business, then you know how important it is to keep up with the trend. Well, everything has turned digital now, no more walking on the streets sharing your products and service, but still, it is an open option. As an online marketer, you probably have heard of a great email marketing software known as OptinMonster. If you haven’t, then, read on.
Among OptinMonster’s unique features are the Announcement and Notification bars. These posts shall explore these features, understanding how they are used in sharing a new promotional offer, coming up with an urgency countdown timer, creating an email list, and notifying visitors of any essential made on the site.
This post also includes how we can install Announcement and Notification Bars on Woo-commerce and Shopify to boost your audience.
Let’s kick-off!
Table of Contents
Announcement Bars
What is an Announcement Bar?
An announcement bar is a banner notification that is found at the top and bottom of your site. It used to deliver helpful information to the audience. In most cases, they are used to inform the audience on information about Product launches, special promotional offers, new content on the site, and not forgetting Lead Magnets.
Luckily, OptinMonster offers a state of the art lead generation, that is very effective when looking for different ways to include Announcement Bars in your Woo Commerce, website. The best part is that the platform can be used across other online sites like Big Commerce, Magneto, and Shopify.
How to install OptinMonster
Step One: The first step is installing the OptinMonster software.
You can find the software from OptinMonster’s leading site.
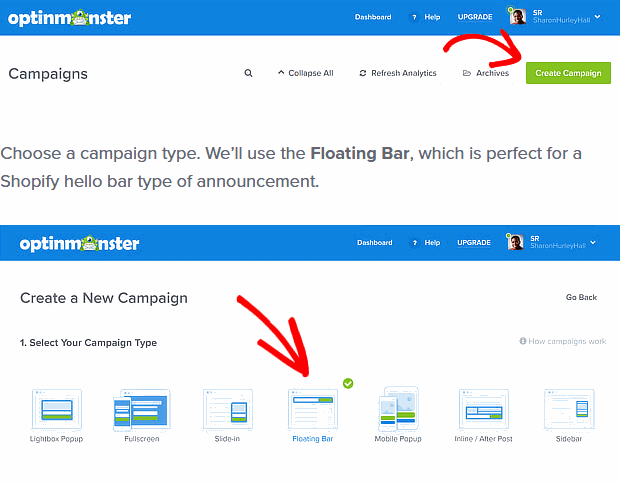
After installing the platform, you have to log into your OptinMonster account and select the type of campaign you want to run. In this case, you shall go for the floating bar. Then look for an eye-catching alert template that fits perfectly on both your desktop and tablet.
When your campaign name set, you have to assign a website to it, then you are ready to go.

Step Two: Coming up with a free shipping Bar
From the OptinMonster editor, you can observe the alert template that is below your browser. Nevertheless, you can change the view to fit your demands. In this step, you will first click on the floating settings that are found in the menu that is on the left side toggled on the load floating Bar.
When you are done with this, you can start customizing your notification bar to meet your demands. Luckily, OptinMonster provides numerous ways you can adjust your announcement bar to meet your preferred design.

Step three: Setting up the Display Rules.
To determine your Woo Commerce, Big Commerce, or Shopify site location, you have to look into the Display Rules which are at the top of the editor. On default, the program will display to the visitor for at least 5 seconds. But you can change it to meet your needs from the Display rules.

Step Four: Integration
The last step is integrating OptinMonster with your eCommerce site. Integration may sound like a tough word, but no need to panic the steps are simple. All you have to do is head to your OptinMonster Word Press dashboard and click on the Auto-generate key. This action hooks up the OptinMontser plugin to your Woo Commerce store, allowing you to control all your campaigns right from your Word Press Dashboard.

Hopefully, these steps have been helpful to your quest. Make OptinMonster your best marketing software companion.